Posted to News on 4th Nov 2013, 17:17
In-line vial measurement at Capitol Europe
To provide high-speed, high-accuracy inspection facilities for production of a new range of vials, Capitol Europe has opted for Keyence optical micrometers in the TM-3000 series.

Capitol Europe specialises in the manufacturing of packages and packaging products for the pharmaceutical industry and medical testing applications. Its strength lies in the specific technological characteristics of its polypropylene tubes and vials that set them apart in several ways. For instance, they are made in one piece directly with their caps.
Furthermore, Capitol Europe has been involved in innovative and patented technologies that guarantees their sterility and efficient sealing. Their active coating also ensures absorption of gases and humidity.
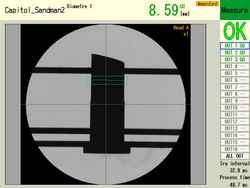
This type of manufacturing entails implementation of a high-precision production process, such as the new production line designed by the Sandmann Company to make plastic vials using an injection process. These parts are 26mm in diameter, with a bevel that is used to pierce the membrane seal. The in-line inspection system required for the application had to show the necessary levels of accuracy while being able to keep up with high production rates. Four sides of each of the 32 parts made have to be measured every 10 seconds (two for height measurements and two more to check the bevels).
Eric Daniel, Maintenance Manager at Capitol Europe's plant in Niederbronn-Les-Bains, says: "We knew that it would be difficult to find a solution that could rise to the challenge; being fast enough while complying with our requirements in terms of precision."
Capitol Europe opted for an innovative approach enabling high-speed, two-dimensional in-line measurement with an accuracy level of the order of a micron: the Keyence TM-3000 sensor. This system does away with expensive off-line inspections that rely too heavily on the operator's skills. The 2D optical micrometer features a high-speed central processing unit and two DSP circuits dedicated to image processing. It can operate at up to 1800 images per minute, thanks to its four processors that operate in parallel.
Uniform beam of collimated light
Its double telecentric optical system transmits a uniform beam of collimated light. This avoids variation in the image projected on the CMOS sensor depending on the target's position. The two-dimensional CMOS sensor detects transition between dark and light areas and measures the target's dimensions. The process, which is also impervious to reflecting surfaces, ensures accuracy levels of 0.5um to 3um depending on the models, with repeatability levels of +/- 0.06um to +/- 0.2um. The measurement range reaches 65mm at a maximum distance of 270mm between the emitter and the receiver.
The micrometers in the TM-3000 series are able to measure up to 16 points on parts to be inspected, and they provide more than 15 measurement modes: diameter, centre distance, intersection point coordinates, angle, height, step, distance to a perpendicular, radius, circularity, etc.
Moreover, the position correction system automatically makes up for any target alignment or tilt faults. This ensures high precision even when positioning is difficult or when the objects are moving randomly. The adjustment system is simplified and it does away with the necessity of a mechanical repositioning device for the parts to be inspected. Furthermore, the LED source technology used shows exceptional stability and has a very long service life. Eric Daniel confirms the fact: "We have made 11,000,000 parts since the TM-3000 was installed. We have not had any measurement problems at all, and the level of accuracy remains stable at 0.03mm.
"We have obtained the result with several repeat measurements of a given production batch. The result shows a remarkable degree of precision, because our parts are irregularly shaped."
In spite of the high performance levels shown by the TM-3000 series micrometers, they are easy to install and operate. Eric Daniel concludes: "My colleague in charge of the system mastered it in 10 minutes and the installation took hardly any time at all." The performance levels of the TM-3000 series have given him ideas for other inspection uses.
To learn more about the TM-3000 series of optical micrometers, please visit www.keyence.co.uk/PRTM.


