
Posted to News on 4th Sep 2017, 17:11
Selecting an inline thickness measurement system
When selecting an in-process system for measuring the thickness of film, plate or sheet materials, a number of important factors need to be considered, including the effect of combined real-world errors, says Chris Jones of Micro-Epsilon.
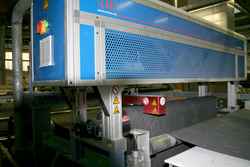
In metals, plastics and rubber production, thickness (and width) measurement of strip, plate, film and sheet is a key quality control parameter that needs to be carried out accurately and as the material is being processed. All manufacturers will have a process specification that they will need to meet in order to satisfy their customers. But in reality, how can a manufacturer be sure that they are meeting these specifications at all times?
A number of different measurement systems can be used to measure the thickness of a material. Some of these are used offline, i.e. random samples of the material are removed from production and measured to verify that they meet the specification. A more effective approach is to install an in-process or fixed, inline non-contact measurement system that continuously measures the thickness of the material as it is processed. If measurements from these systems move towards the outer limits of the specification, machine and process control parameters can be altered to bring the thickness back into acceptable limits.
Build in-house or purchase a turnkey system?
The first factor to consider is whether to design and build the measurement system in-house rather than purchase a turnkey system from a supplier. While there are many suppliers of sensors that can be mounted inline with simple framework and signals output to a local display or HMI for thickness calculation, verifying the actual measurement accuracy of this type of system can be difficult. It is considered best practice to use a measurement system that is 10 times more accurate than the production tolerance. With many production tolerances reducing to below, for example
What is important when selecting a suitable system from a supplier is to understand the combined real-world errors that can occur when using a non-contact thickness measurement system and how these errors can be eliminated or compensated for. While many suppliers state on their datasheet that the measurement system meets a certain resolution and linearity, in the real world this performance is affected by a number of environmental influences. Errors associated with real-world thickness measurement are not always so obvious, but can combine to create significantly large errors. It is therefore critical to select a system based on system accuracy, not just sensor accuracy.
Verification of system capability
Look for a measurement system that provides fully automatic process capability (CPc, CPk, etc.) features with in-built statistical functions that are available to the operator at the touch of a button. This should also include a store and print out feature that allows the operator to verify the material thickness at any time, with no supplier involvement required.
Mechanically and thermally stable
It is very important to design a mechanically and thermally stable sensor mounting frame. The mounting mechanism should be isolated from process or machine vibration as best as possible. Mounting with an O-frame is more stable than using a C-frame.
Thermal expansion of mounting materials is often overlooked as a source of large errors in precise thickness measurement. Therefore, selecting materials with as low a thermal expansion coefficient as possible is very important. For example, mounting sensors on a typical aluminium or stainless steel extruded profile, with a thermal expansion coefficient of ~16ppm/K, experimental testing has shown that just a 5degC change in ambient temperature can move the sensors by >80um! In contrast, using a standard grade Invar mounting frame with a thermal expansion coefficient of typically 1.2ppm/K reduces this to 6um. Specialist Invar grades can reduce this error by half again.
Of course, some suppliers of inline thickness measurement systems provide automatic calibration features built into their system as standard, which can continuously compensate for thermal expansion errors. This feature also means the operator does not have to spend time calibrating and checking the system.
Errors due to non-alignment of the sensors
Special attention must be paid to the alignment of the sensors, which are typically installed opposite one another. No misalignment, tilting or inclination of the sensors relative to the target object is permissible in order to ensure the sensor spots are measuring at the same point all the way through the measurement range. For example, for a misalignment of 1mm and an inclination of 2 degrees, there will be a thickness measurement error of 35um. In the case of a 10mm target thickness, this error increases to 41um.
Combined linearity errors of up to 8um, for example, can be seen with a vertical target movement of just 200um of the target in the measurement field even if the target has the same thickness. The combined error of non-linearity from both sensors must therefore be compensated for. As a supplier of non-contact inline thickness measurement systems, Micro-Epsilon has developed its own methods of precise sensor alignment (which took three years to develop!) and patented algorithms for this process.
Errors due to non-synchronised data
In order to avoid thickness calculation error due to movement of the target, both sensors must be perfectly synchronised so that they perform the measurement at the same time, at the exact opposite point of the target. If synchronisation does not occur, inaccurate measurement data is produced. For example, if measurements are taken at different time intervals, micro-vibrations of the target or of the sensor mechanics will result in a thickness measurement error. For example, for a time-delayed measurement of 1ms, a deviation of 125um is produced (assuming 1mm vibration at 20Hz).
Positioning of the sensors/measuring range
Position, measuring range, thickness deviation and vibrations must be taken into account when the sensors are installed. For correct thickness measurements, the target must always be located within the "measuring range' of the sensors. If the target moves outside the measuring range at any time, this can lead to inaccurate measurements. In particular, any special operating conditions such as start, stop or speed changes must be carefully considered when positioning the sensors.
Measuring rates of the sensors
Most thickness measurement applications are either in a process/quality control environment where the object to be measured is fast moving, or in a "part inspection' machine where the object is static and the laser sensors are scanning the part in as short a cycle time as possible. In both cases, it is important to match the laser measurement speed to the spatial resolution or cycle time required. Faster measuring rates are not always best, as the laser sensor accuracy can suffer on difficult-to-measure surfaces when using high-speed measurement rates.
To learn more about inline thickness measurement systems please visit www.micro-epsilon.co.uk.
No. 1 Shorelines Building
Shore Road
CH41 1AU
UNITED KINGDOM
+44 (0)151 355 6070


