
Posted to News on 29th Oct 2013, 15:21
Watchmaker uses Keyence to optimise metrological inspection
The renowned jewel-bearing specialist La Pierrette uses Keyence's IM Series image dimension measurement system to improve the repeatability and rate of its tests.
La Pierrette SA has been a supplier to the most prestigious watchmakers since 1914. Quality, precision and reliability are the three "key watchwords" of this Swiss company, which meets the highest standards in gemstones for movements in fine timepieces, particularly those bearing the Geneva Seal stamp. The main purpose of jewel bearings is to reduce metal-on-metal friction which, in short time, can ultimately result in bearing seizure and vastly reduced contact surfaces. La Pierrette SA produces a broad range of synthetic sapphires and rubies, from the simplest to the most complex, for luxury watch movements at its home base in the heart of Switzerland's Joux Valley, the cradle of fine watchmaking. It is a key player in the luxury watch industry and employs a workforce of more than 100.
Romain Conti of La Pierrette's R&D department explains: "The manufacturing of jewel bearings is a complex process because diamond is the only mineral harder than the gems that we cut. As a result, diamond machining is the only possibility, which makes for very tight manufacturing tolerances. Depending on the target characteristics, the tolerance intervals are between 2 and 8um, meaning that production is possible only with specially engineered machines. All this also requires many metrology operations.
"Before, we performed all our inspections using manually operated stands. Because many dimensions have to be characterised repeatedly on each bearing, this process was long. With the IM Series, this process is much more automated and faster. Not only can we inspect a series of pieces at the same time, but our measurements are more complete because we can now also check for flaws in shape.
"The system is really easy to set up and it was up and running in virtually no time. We decided to put it through a probationary period in order to qualify the measurements obtained with it and make sure that they met our accuracy requirements. We "empowered' the system with the measurements we had obtained with our manually operated stands and calibrated gemstones qualified by METAS, the Swiss national metrology institute. That enabled us to optimise some settings. Nonetheless, and very quickly after putting the IM Series into actual service, we saw that it made the inspection process five times faster."
Identify production deviations
This time saving is essential at La Pierrette SA, which turns out several million pieces each year. Mr Conti explains: "We have to inspect every visible piece both in terms of conformity and appearance. However, our production volume allows us to inspect only a small fraction of the other pieces. The IM Series enables us to increase the number of inspections and thus improve the quality of our products. That, coupled with the fact that the IM Series allows us to directly view measurement statistics, helps us to identify production deviations much faster. The IM Series was an immediate success with the members of our inspection department and is used regularly by 5 or 6 people."
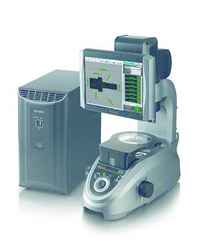
The IM Series image dimension measurement system makes it possible to obtain high-accuracy, reliable measurements in a minimum of time. Simply place a target on the stage and press the button. Up to 99 points are measured in a matter of seconds with a high degree of accuracy. Its automatic operation and repeatability of +/- 1um eliminate inter-operator variability problems.
Mr Conti says: "What's more, it eliminates repeatability problems inherent to our measurement stands, such as button wear and stage alignment." The IM Series image dimension measurement system also allows simultaneous measurement of several dimensions as well as geometry inspections. For further information please go to www.keyence.co.uk/PRIM6.
Want the latest machine building news straight to your inbox? Become a MachineBuilding member for free today >>


